- No products in the cart.


Welcome back to Glamping Week. I had so many wonderful comments yesterday, I hope I can reply to them all soon. Lot's of you seem to have childhood memories of camping and that's really neat to hear about. We weren't campers or glampers so I have to admit when my husband tried talking me into camping it took a few years. I finally said yes, when he said we could camp at the beach. The beach is my happy place and getting to hear the ocean as you sleep is pretty awesome. Plus, he was smart and bought us blow up air mattresses for the tent. That was a huge change in the way I had camped a few times before, no tree roots in your back.
I showed you all of the demolition and wood replacement yesterday, today I thought I would show you all of the sewing I have been doing for this camper. Before we get started let's get some business out of the way. Did you sign up for the give-a-way?
a Rafflecopter giveaway
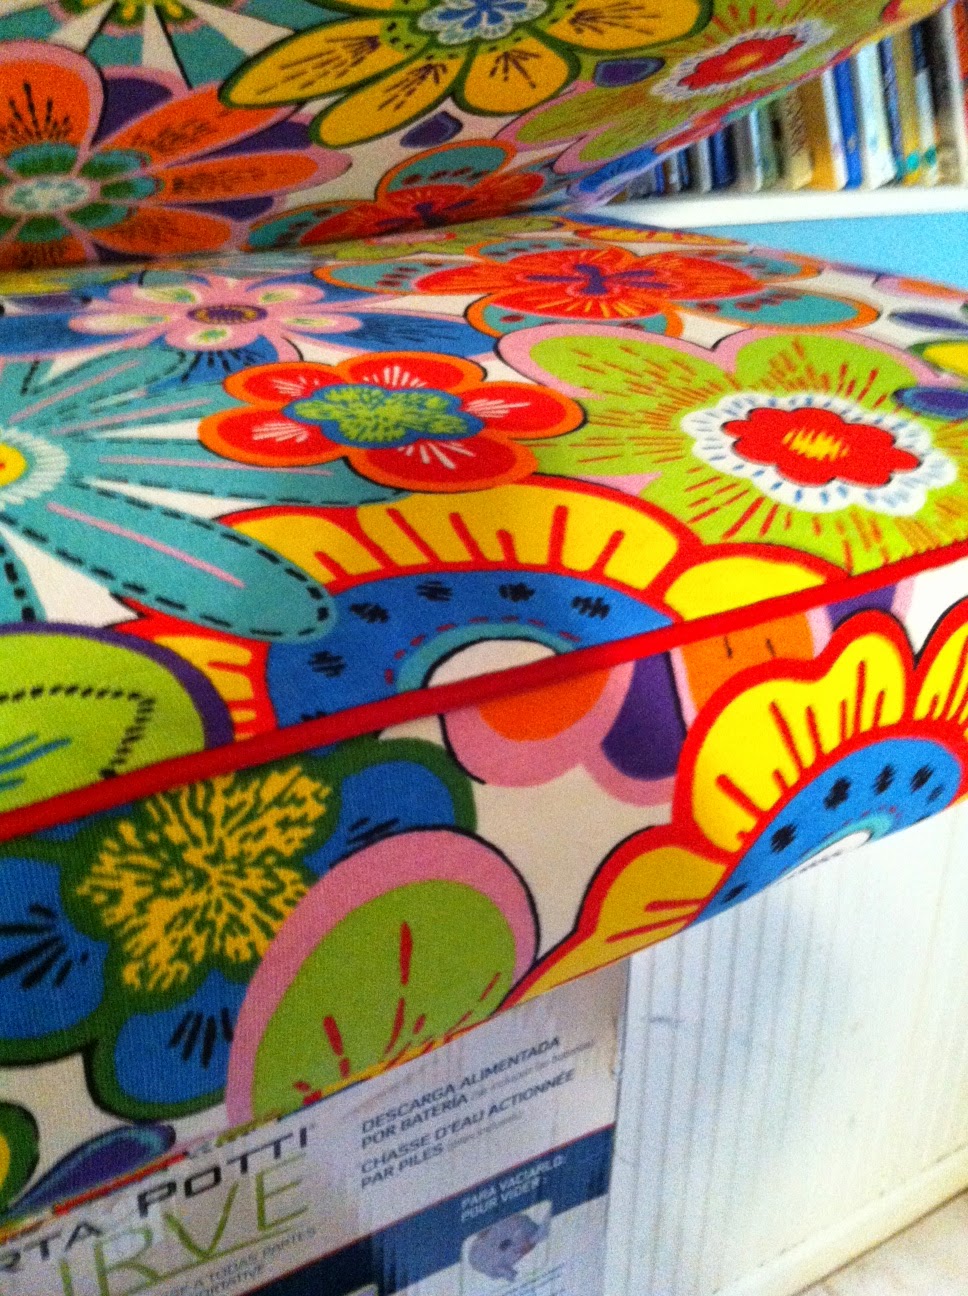
Okay, now we are on to sewing. We bought all new foam cushions for the camper, which meant they needed to be covered. This fabric was one of the first things I bought for the camper. I bought it last summer as soon as I saw it I knew it was the cushion fabric. So no, I didn't design it. I needed a heavy duty canvas for cushions, couldn't use my quilting fabric.
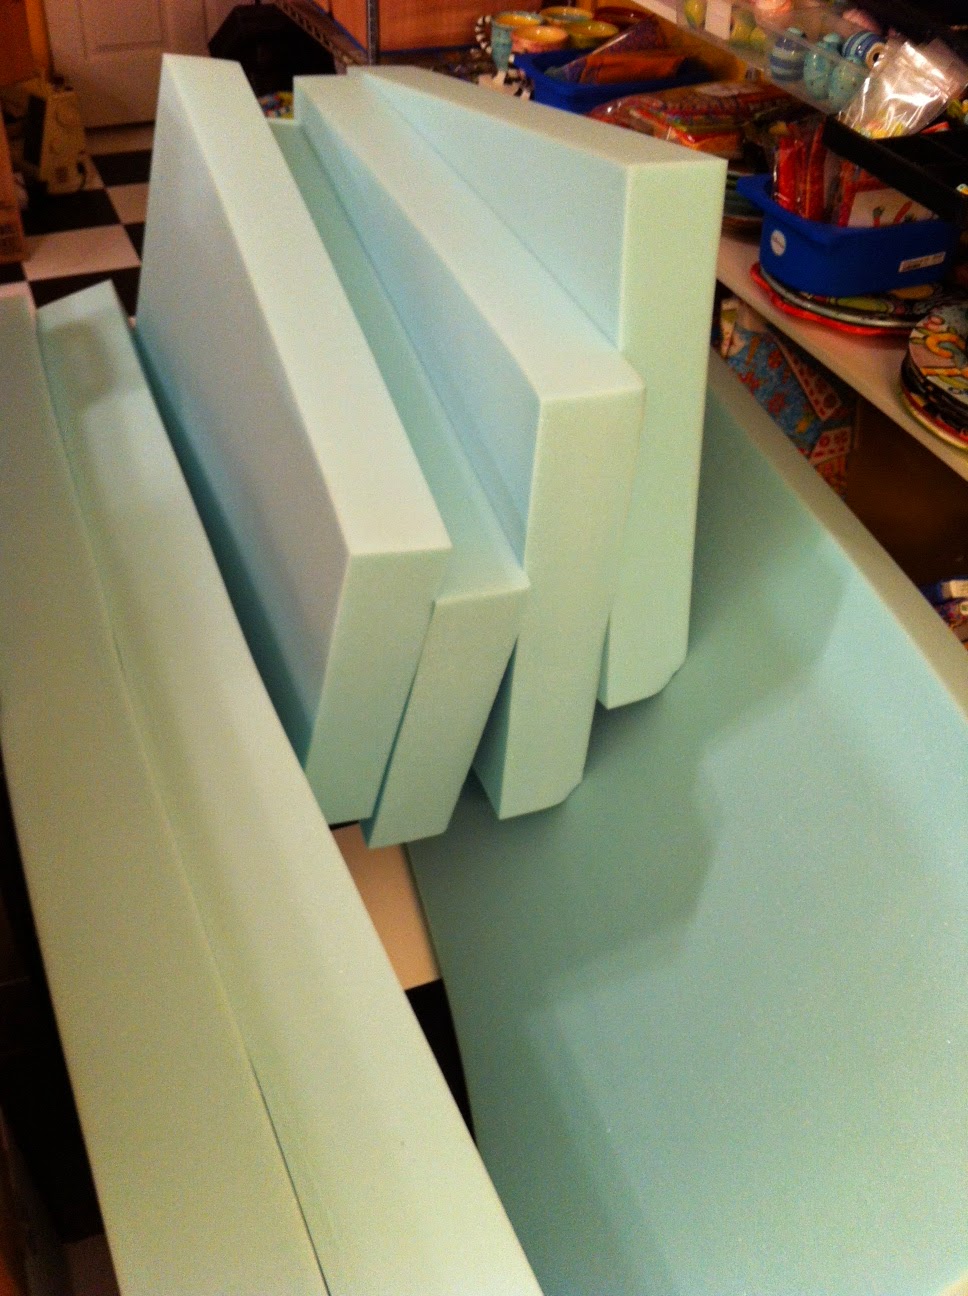

I bought red vinyl and made piping for the dinette cushions. There are four of them. Then I covered two long futon cushions and another small mattress for the loft. It was quite a weekend of sewing. But I am happy with how they turned out.
My next bit of sewing was the curtains. I made my easy to sew favorite kind of curtains for the camper. I chose two different sets of fabrics for the curtains. The front of the camper has the white with red and white striped trim and the back of the camper has plaid with a red border. Everything coordinates but I personally could never have all of the curtains match.

Just in case you want to make some of these curtains, this is how quick and easy they are. Your basically sewing a square, I wanted two fabrics so mine got a little more complicated. Measure the width of your window and divide it by half. Next, add that half number to the full width number. That's how wide the curtain fabric will be. Then measure the height of the window add a half inch to that measurement, now double that number. That is what this rectangle below is, I just sewed two fabrics together before I cut out my measurements.

I sewed some small pom pom trim across the seam. With right sides together, sew the top edge to the bottom edge. You have a tube shape now. Press it flat so you have the border (if you have one) where you want it on the curtains and sew down each side. Leave about a 4 inch opening for turning. Turn the curtain right sides out and top stitch down each side. Piece of cake so far right? It's about to get easier.

They sell these rings in the curtain hardware department just about everywhere. You pinch the sides of the rings and the bottom opens up and you just slide the fabric in. Space them out across the top and you have curtains! My favorite part about these curtains is how easy they slide across the curtain rod. It makes them easy to open and close and in a camper we will be doing that a lot.

I guess you'll have to wait until later in the week to see them hung, because right now I have ow where to hang them.

On to the awning now, this is another one of those things we didn't stick to tradition on. Usually the vintage travel trailers have rope and pole awnings. But most of the time we are camping we will be on concrete and you need to stick those poles in to something. So we chose to make one that didn't need to go in to the ground. It will be much quicker to set up as well.

I found these pieces at sailrite, it's a boating store. One end fits onto a pole and then with the quick release pin it connects to the wall mounted bracket.

I use the poles from an indoor art fair tent that I had for the awning bars. I just ended three. We kept them as long as possible because we figure we will live under the awning probably more than in the camper. It ended up being about 8 x 10.
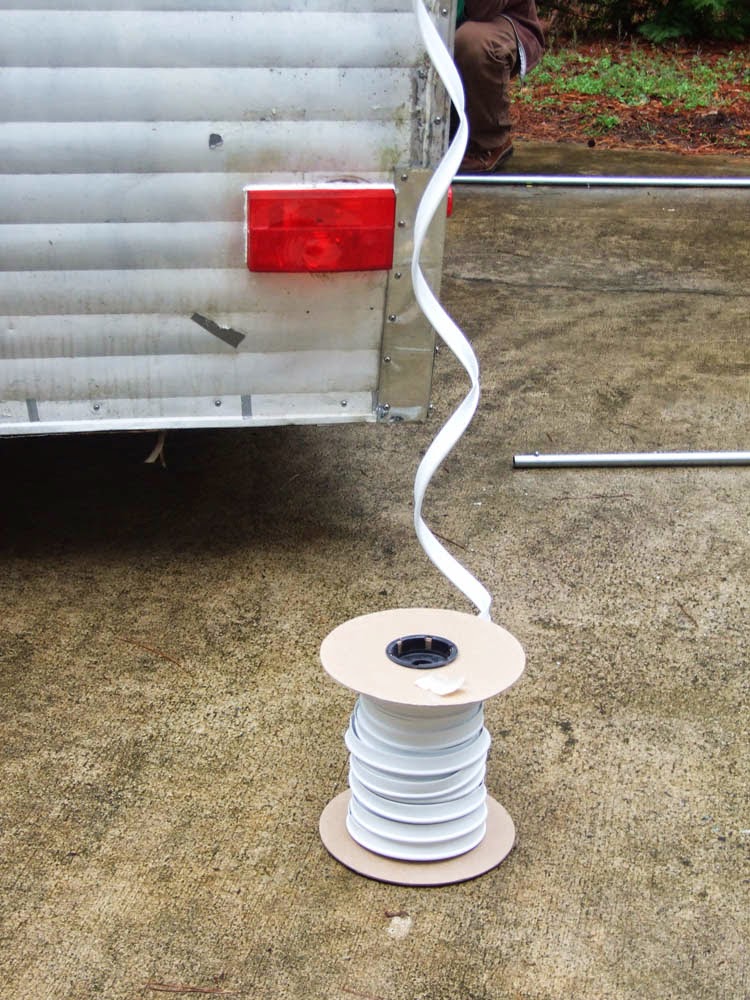
I bought a big roll of welting also. This is a little tube that you sew to the edge of the fabric and it slides through a grove on the camper to hold it. We are also using it on the inside of the camper to fill in corners and other seams.

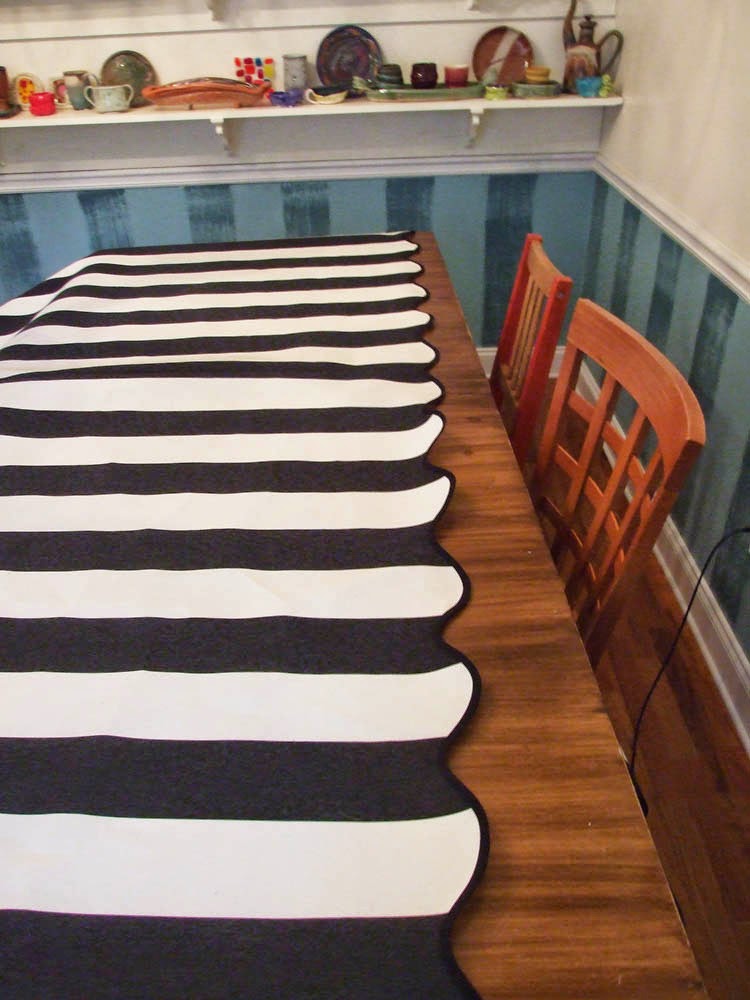
I bought dyed acrylic fabric called Outdura, it can get wet and won't mildew or fade. Expensive, but I never want to sew another awning. We debated on colts for awhile and ended up going with black and white, you know that's kind of my "thing".

I made a template and cut out scallops. Any raw edges need to be covered in bias tape, made from the same weather proof fabric.

I also sewed little fabric loops in with the bias tape. That way I would have a place to hang my lights.
You can kind of see them around the edges.

And here are my lights. I bought them on Ebay, they are vintage blow mold lights. I have a thing for blow molded plastic. I found a seller that had a hodge podge listing of owls, lanterns, and honeycombs. I snatched them up and put them on a new light strand. I want to hang them on the awning so badly, but I think I have to wait for now.
That's it for sewing so far, I still want to sew quilts for all of the beds, storage baskets, etc. I just haven't found the time. I did find the time to make up this new pattern during all of my sewing. It started out for me. I wanted a bag to carry my makeup, jewelry, whatever in the camper. So I decided to make it a camper. You can find it in both shops, Jennifer Jangles Shop and the Jangles Etsy Shop.


Visit my Website, Etsy Shop, Blog, Facebook